In this blog I am going to give you an insight into how easy it is to generate random data loads to populate your SQL Server 2008 R2 Database using Visual Studio 2010 Ultimate. This can be very useful in load testing your system or if you are just wanting to load your database with random data to perform other bench marking tests.
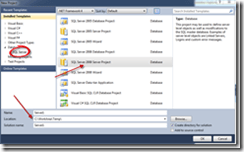
To start off once you have VS2010 open you will need to create a new SQL Server 2008 Server Project. This can be achieved by either clicking File | New | Project or New Project shortcut key
Select the location where you will save your project, Ensuring you have selected Database | SQL Server for your project and SQL Server 2008 Server Project and Click OK
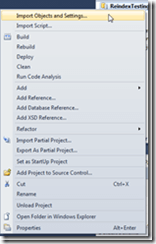
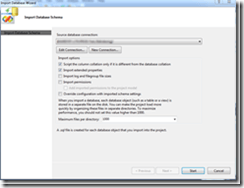
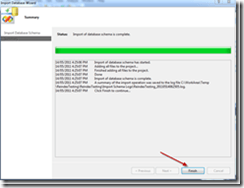
Next you will need to add or associate a database schema to your newly created project. This is achieved by importing an existing database from your instance of SQL Server 2008 R2. Select the database you wish to import and click Start. Once this completes you can click Finish and you are ready to start your test data load generation.
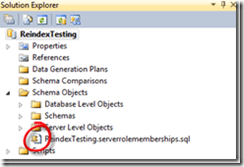
You will now see as part of your solutions explorer the newly imported sql structure as a .sql file under the Schema Objects section.
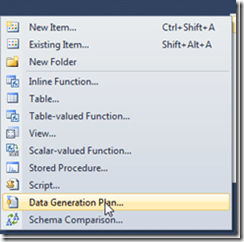
By right clicking on Schema Objects | Add | Data Generation Plan
Ensuring you select the Data Generation Plan and click Add, your project will now have a Data Generation Plan with the tables from your database.
Change the number of rows that you want generated and populated into your tables. If any of your tables have relationships then make sure you specify these as this will impact the final data load. You can also choose if you want a ratio between rows inserted that have a relationship. Ie Table_A & Table_B might be related and as part of the load I want for every 1 row inserted into Table_A I want 10 rows inserted into Table_B. For the purpose of this blog I have not included any relationships.
For each table you need to look at the underlying columns and the data types and ensure that your generated data matches the data types of your tables. By default they are matched pretty well, however you may wish to change the data type. Once you are happy with your setup you are nearly ready. You can preview what your data is going to look like by right clicking a table and selecting preview. As this is randomly generated data the data is not going to make much sense.
Now that you are ready to load the data select the Data Generation Plan in your solution explore and go to the Data Menu option | Data Generator | Generate Data
Select your database you are going to load and click OK. You will be asked if you wish any existing data to be deleted or not before generating new data. Depending on your scenario you may not want to delete existing data from your database tables.
We have now successfully loaded all randomly generated data into our 4 tables in our new database. Congratulations on mastering this tool to generate your test data. You can also configure the data generation to be based on specific data and not just being random to make your data more meaningful. To achieve this you need to pre-generate some meaningful data in some lookup tables to be accessed as part of the data generation process. I have not covered this configuration in this blog.
I may come back to that in the near future.




Leave a Reply