With the creation and utilisation of Notebooks in Azure Data Studio, there are already a number of kernels that you are able to use in your notebooks.
For each of those kernels there is an ever changing and expanding need to understand the various requirements you have to have in place prior to being able to use the kernel you need to use.
How do we keep track of what we have already installed and what we need to install to stay up to date and that we have the correct pre-requisites?
Some of that is handled with the dependency wizard, see my previous post on the dependency wizard.
The other is that we are able to easily see what we currently have installed as well as easily add new packages to our environment.
Manage Current Packages
To view the currently installed packages for a particular kernel, open an existing notebook or create a new notebook. Now that we have the notebook open if you select the kernel drop down, you will see the available kernels.
Select the kernel you are interested in and you will notice to the far right a new icon has appeared.
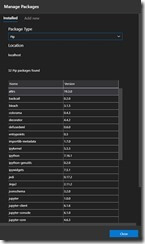
Select the Manage Packages will display the full list of Packages installed for the kernel.
If there are additional packages that you need to install that are not included in the default configuration, you can easily do this from the Add New tab.
Enjoy working with your data in Azure Data Studio


[…] Multiple application Kernels […]