Containers are a great way to undertake your development or demo work. Using Azure Data Studio with Docker makes this really simple.
In this post we will have a look at how we can work with Docker to do some simple development or demo work with SQL Server in Containers.
You will need to have downloaded and installed Docker already. This is pretty easier to do and you can download from here – Docker.
With Docker installed, from Azure Data Studio in the terminal window we can run all of our Docker commands.
In this post we will look at using a SQL Server 2017 image to work with.
To download the latest SQL Server 2017 image we can run the following command.
 <# Download the latest SQL Server Image #>
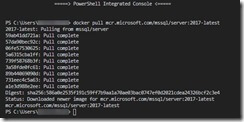
docker pull mcr.microsoft.com/mssql/server:2017-latest
This will take a little bit of time depending on your internet speeds, but once completed a successful download looks like this.
To look at what images you have available / downloaded already you can use this command:
docker images
Now that we have an image, we need to create our Docker container running SQL Server for the image we have downloaded and want to work with.
To create a new Docker Container running SQL Server we can use this command:
<#
Create Docker Instance using latest 2017 Image
Create on local host port 1808
Create on Internal port 1433
#>
docker run -e "ACCEPT_EULA=Y" -e "SA_PASSWORD=Pa55word1!" -p 1808:1433 --name sql2017_1 -d mcr.microsoft.com/mssql/server:2017-latest
To see a list of all running container images we can use:
docker ps -- List the running Docker Containers
Now that we have a running container we need to connect to that. We create a new connection (see Azure Data Studio – 3 Connections) and add it to our Containers Group making it easier for us to manage our container connections.
As an optional extra with our Connections, you can give the connection a name that is different to the container name so that it is a little more meaningful.
We are now good to go and access our newly created container image, just like we would any other instance of SQL Server.
Once we have finished doing what we are doing, we can stop in the container instance very easily with the following command:
docker stop <Container ID> -- replace with your container ID
And to round out the process we are able to remove the container using the following command:
docker rm <Container ID> -- replace with your container ID
Azure Data studio makes this so simple for us as we can undertake all of this from inside of 1 application.
Enjoy working with your data in Azure Data Studio


Leave a Reply