


Now that we have our Azure Arc-enabled SQL Managed Instance deployed, potentially one of the most common tasks you will need to undertake is being able to perform a database restore of an existing database to your newly provisioned Azure Arc-enabled SQL Managed Instance.
In our previous post, we deployed our Azure Arc-enabled SQL Managed Instance – “ae-sqlmi-demo” that we will continue to investigate and learn about how we can utilize in our data environments. In this post, we are having a look at restoring a database.
Now, most of you will already be aware of how to restore a database and this post is not an introduction to performing a database restore. However as our Arc-enabled SQL Managed Instance is running on Kubernetes and our deployed operating system is Linux, most of you will probably not be familiar with the slight differences compared to running and managing your SQL Server environments on windows operating system environments.
You will be aware that an installation of SQL Server in a windows platform places the various files for your instance (without changing the default locations) in a structure like this:
- Program Files\ Microsoft SQL Server\MSSQL[xx].[NamedInstance]\MSSQL
- Backup (Contains database backups)
- Data (Contains .mdf & .ldf files)
- Log (Contains error logs files, trace files, and system health files)
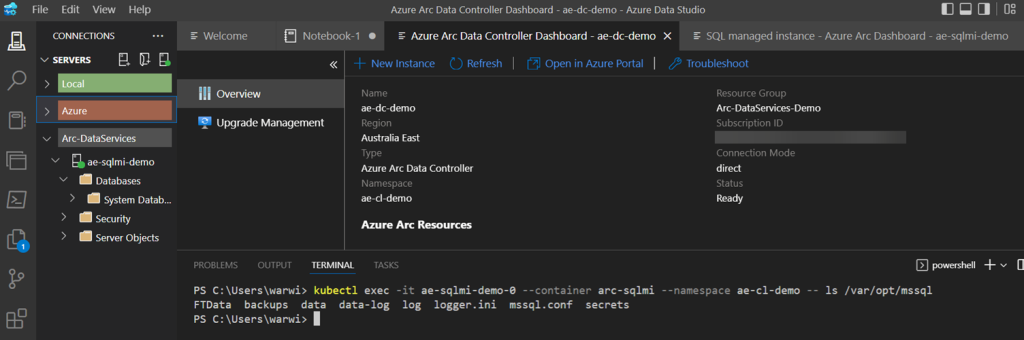
In Linux and in particular, for our Arc-enabled SQL Managed Instances the folder structure is a little different:
- /var/opt/mssql
- FTData (Contains Full Text Data files)
- Backups (Contains database backups)
- Data (Contains database data files – .mdf)
- Data-Log (Contains database transaction log file – .ldf)
- Log (Contains error logs files, trace files, and system health files)
To see the directory structure for your Azure Arc-enabled SQL Managed Instance in Azure Data Studio, using the terminal window we can run the following commands to investigate our new environment:
Kubectl get pods -- namespace ae-cl-demo
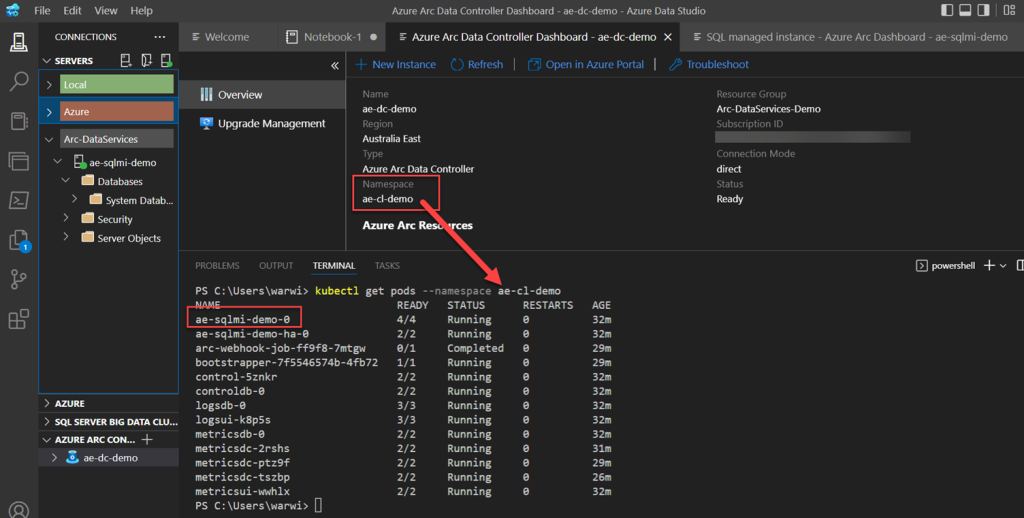
Next, we can list the directory structure for the chosen deployed pod:
Kubectl exec -it [podname] –container ae-sqlmi –namespace ae-cl-demo – ls /var/opt/mssql
The thing to be aware of at this stage now is dependent on your deployment tier. If you are running a General Purpose Tier deployment, like my environment, then you only have 1 pod deployed. If you are running a Business Critical Tier, you will need to ensure you are connecting to and restoring to the primary replica.
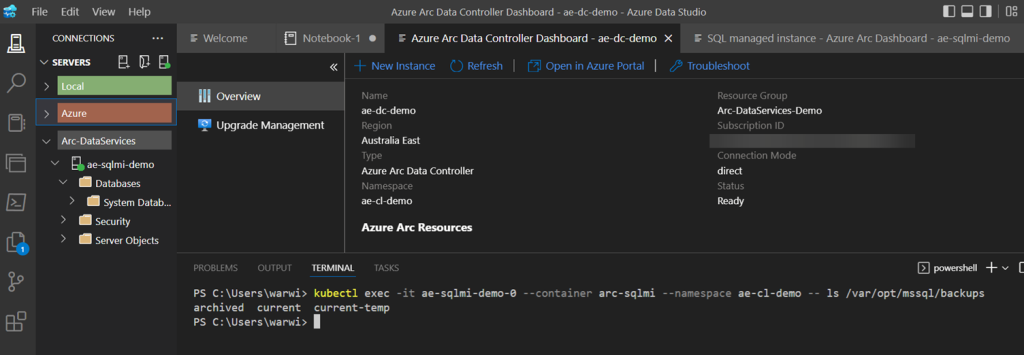
To view the list of database backups available on the correct pod, we can run the below command:
Kubectl exec -it [podname] –container ae-sqlmi –namespace ae-cl-demo – ls /var/opt/mssql/backups
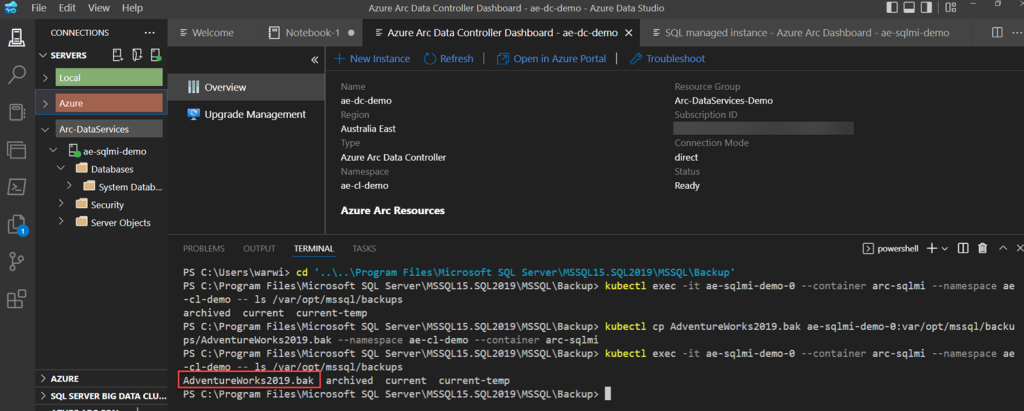
Now we will navigate to the folder where we currently have our backup file we wish to restore to our Azure Arc-enabled SQL Managed Instance, and run the following command to copy our backup file to our Azure Arc-enabled SQL Managed Instance location.
Kubectl cp AdventureWorks2019.bak ae-sqlmi-demo:var/opt/mssql/backups/AdventureWorks2019.bak --namespace ae-cl-demo --container arc-sqlmi
Now performing a restore is just like you would normally do, the only difference is the pathing being on Linux and not windows.
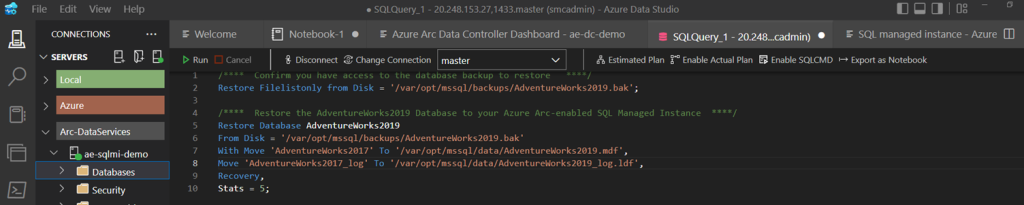
Congratulations, you have now restored a database to your new Azure Arc-enabled SQL Managed Instance. Refresh your list of databases to see the restored database that you can now manage like you would any other database.
In our next post, we will have a look at Managing the Azure Arc-enabled SQL Managed Instance.

Leave a Reply