


Now that we have our Azure Arc-enabled Data Controller configured and available, we can now deploy our first Arc-enabled SQL Managed Instance into our environment. As previously mentioned depending on the type of configuration required for your environment with your Arc-enabled Data Controller (Directly connected or Indirectly connected modes) this will dictate the approach available for you to setup / configure your Arc-enabled SQL Managed Instance.
For this post series we have a Directly connected mode data controller. As such we are able to perform our installation of the Arc-enabled SQL Managed Instance in any of the following ways:
• Azure Portal GUI Deployment
• Azure Data Studio GUI Deployment
• Azure Portal Cloud Shell CLI deployment
• Azure Data Studio Terminal CLI deployment
• Powershell CLI deployment
We will have a look in this post the deployment method of deploying using Azure Data Studio. The reason I am doing this is with the appropriate extensions in place, the deployment method creates a workbook that you are able to save and investigate all of the requirements allowing you to look at your requirements in your environments to allow for creating your own automated deployments utilising the CLI commands ensuring that you have a repeatable process for all future deployments.
Ensure you have been through the first post in this series and have the extensions in place in Azure Data Studio allowing you to undertake your first deployment.
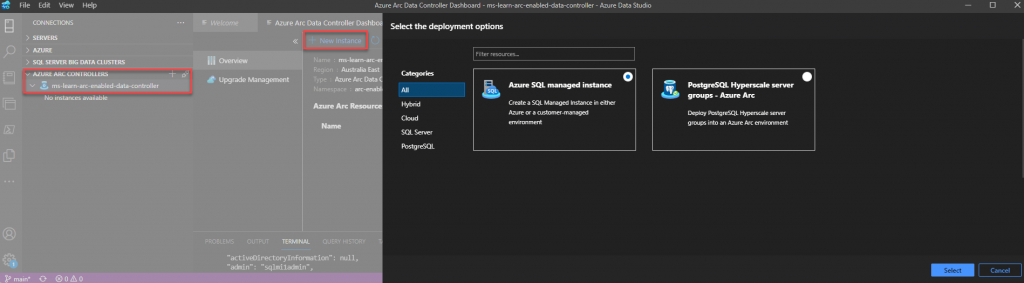
- In Azure Data Studio, on the connections tab expand Azure Arc Controllers
- Click connect controller and connect to your Arc-enabled Data Controller you created from post 3 in this series
- Right click on your Arc-enabled Data Controller and select Manage
- Select New Instance
- Select Azure SQL Managed Instance
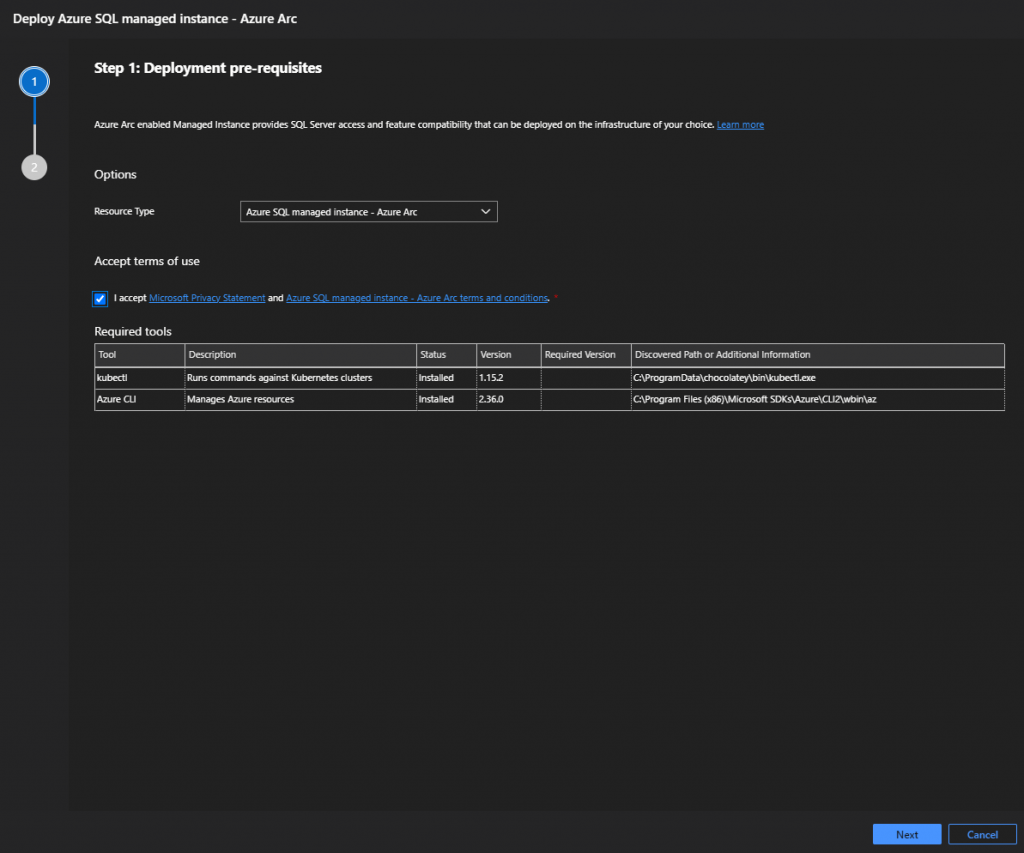
- Review and accept the EULA
- Populate all of the required data for your Arc-enabled SQL Managed Instance
- Instance Name
- Instance Name Admin Account and Password
- Choosing the appropriate service tier (GP vs BC)
- If you have Azure Hybrid Benefits, choose apporpriately
- Select your appropriately configured storage classes that have been pre-configured in the underlying kubernetes cluster
- Ensure your backup storage class is ReadWriteMany(RWX) capable
- Set your vCPU request to how many vCPU’s you need
- Set your vCPU limit to the maximum you want to have available
- Set your memory request
- Set your memory limit
- Click Deploy
- At this stage a notebook will open allowing you to review and deploy your Arc-enabled SQL MI
Depending on the resources provisioned on your kubernetes cluster, the deployment process time will vary. Once the deployment has completed, inside of Azure Data Studio, perform a refresh of the Manage Data Controller pane and you will see your newly provisioned Arc-enabled SQL MI as a resource.
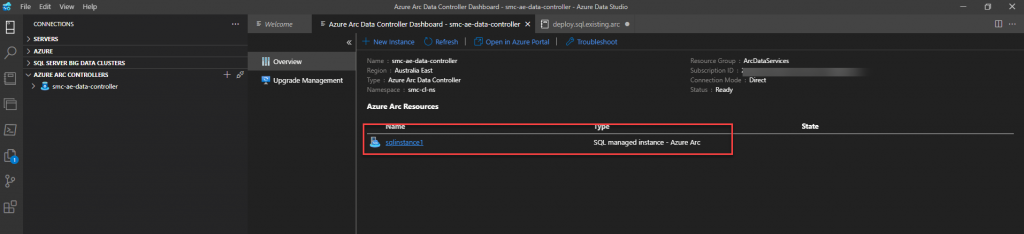
You will also be able to see this newly provisioned resource in your Azure Portal under the Data Controller resources.
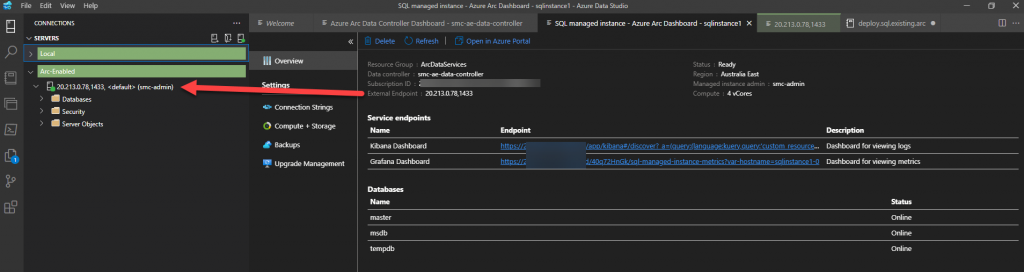
Clicking on the newly provisioned Arc-enabled SQL MI will give you your details for your newly provisioned Kibana and Grafana dashboards where you can monitor your new environment.

You will also find on this management tab your connection details for you newly provisioned Arc-enabled SQL MI. With these details you can connect to the newly provisioned instance the same as you would any other instance of SQL Server.
Take time now to investigate your newly provisioned Arc-enabled SQL MI.
In our next post we will look at restoring a database to our Azure Arc-enabled SQL Managed Instance.

Leave a Reply