Managing and Maintaining a SQL Server environment is nothing new to most of you. You are probably used to managing environments with quite a large number of Agent jobs running.
These agent jobs are probably broken down into a number of groups like:
- Database Maintenance Jobs
- Application Jobs
- Batch Processing
- ETL
- Reporting
Azure Data studio as long as you have the extension installed, either the SQL Server Agent extension on its own or Admin Pack for SQL Server extension which includes the SQL Server Agent Extension along with SQL Server Profiler, SQL Server Import and SQL Server Dacpac just to make your life easier as an Administrator, gives us the ability to manage those Agent Jobs.
But we can take this one step further. Given Azure Data Studio has the ability for you to create and work with Notebooks we can create NoteBook Jobs. To see these you can right click on your Instance Name, Select Manage and under Administration you will see the SQL Agent viewlet.
Pre-requisite setup work
- Pre-create a database to store the notebook metadata and execution results
- Pre-create an Agent Job Schedule
New Notebook Job
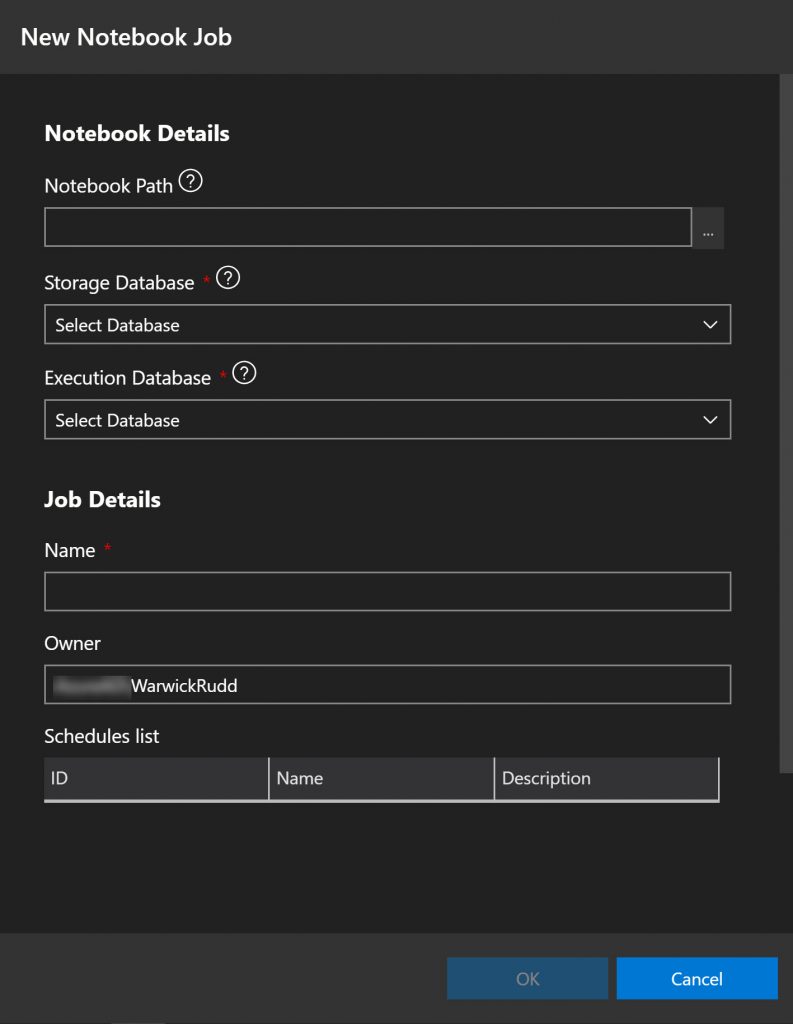
To create a new Notebook Agent Job, under the SQL Agent Viewlet, select the Notebooks Tab and click the New Notebook Job.

- Navigate to the location of the Notebook you are wanting to use in your Agent Job.
- Select the Database you wish the metadata and execution results to be stored in
- Select the Database you wish the Agent Job to be executed against
- Enter the Name you wish to call your new Agent Job
- Select the Schedule you wish the Notebook Job to run under
- Enter a description for your new Notebook Job
- Click OK

Metadata Tables
After your new Notebook job has been created, if you navigate to your Storage Database (database you chose to store the metadata of the notebook job), you will note 2 new tables have been created.
- Nb_materialized – stores results of the notebook code cells executed through the Notebook Agent Job.
- Nb_template – stores the Notebook contents that you selected when creating the Notebook Agent Job.

Something to remember when you are working with Notebook Jobs, if you edit the Notebook file on the operating system, this does not update the template information. You will need to edit your Notebook Job. When you select Edit, navigate to the saved Notebook again and click save. This will update the metadata in the nb_template table.
Viewing Execution Status
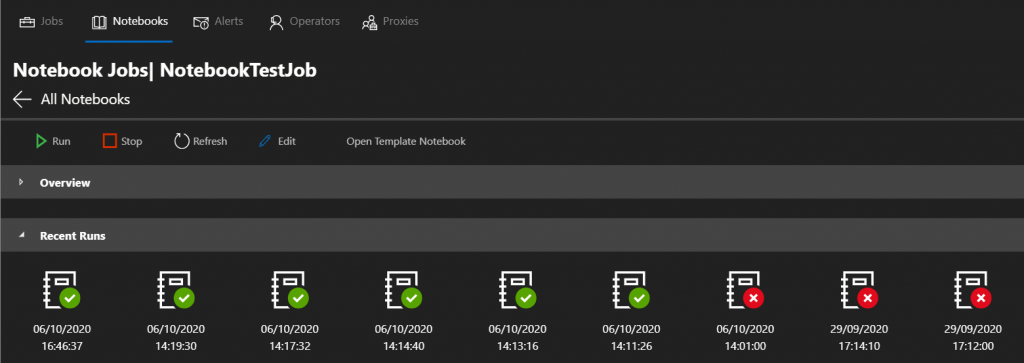
Now that you have successfully created a Notebook job, it will either run on your schedule or with you executing it manually. If you click on the SQL Agent Viewlet | Jobs tab, you will see your notebook job along with all of your other Agent Jobs, or you can specifically click on the Notebooks tab to just see your Notebook jobs. On the right hand side you can see the results of previous executions and the graph will show green for success and red for failed.

Clicking on the specific Notebook job will give you further details on recent executions. By doubling clicking on the specific execution this will actually open a notebook, populated with the statements and results from the execution.

This makes it very simple for you to share those results with your team or a vendor if required.
Viewing the Notebook
If you happen to inherit some Notebook jobs, with starting a new job you may want to see what is the template being used for the execution. Click on the Open Template Notebook, and this will open a Notebook in the editor , that is created based on the information stored in the nb_template table.
Notebook Jobs are going to change the way you are able to manage and maintain your environment, capturing results and being able to easily share those results or have other processes in place to act based on the results of job having been executed.
Enjoy creating and using your Notebook Jobs.


Leave a Reply